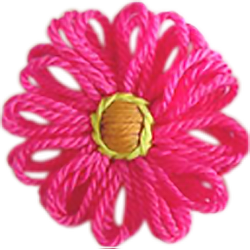
This post has been moved to a permanent page – Hamanaka Flower Motif Cards
Have you ever been caught up in viewing the perfect blogs of seemingly perfect crafters with perfect homes and ended up feeling like crap because you can’t get the cat out of the ceiling and the baby is running around with no pants on?
I certainly have, so I dedicate this post to all my fellow craft bloggers who grab 5 minutes of crafting whenever they can (occasionally in the middle of the night), take blurry photos with whatever camera they can find (and fix them in photoshop later), and occasionally write craft tutorials before they’ve had a shower.
This is what my desk looked like this morning after I had my breakfast. This is the neat version 😛

Aside from my breakfast bowl and tea mug, there are the tissues that the baby pulled out of the tissue box, headphones that belong to someone else because mine have no foam on them, a foam-less microphone (the baby stole it), crinkly plastic that I’m saving for a tutorial, paper rope and a million other things.
It now also contains the TV and XBox remotes that I saved from the baby.
Speaking of the baby, here are the pants that I couldn’t get him to keep on.

I was going to say “the pants he was wearing 5 minutes ago” but it’s now closer to an hour…
But he does have his shoes and socks on

Yes, that is a pile of bags of fabric behind him. At some stage they will become t-shirts for him for the next few years. If I can ever get the sewing machine out. That would be my daughter’s sewing machine, mine has to go in for repairs. Oh and the tissue and toilet paper roll in the previous pic? Well he’s just learnt to blow his nose and um, he likes cardboard rolls. They make great trumpets when you have a headache.
And you know what? I bet somewhere in those perfect homes of the perfect crafty bloggers they’re keeping something a bit like this a secret.
At least I like to think so 😉
* During the writing of this post I have fed the baby, put his shoes and socks on, talked to him while he wanted to know why he couldn’t have some homemade crackers on a blog I was looking at (they look really good!), rescued my craft books from his little hands that like to tear up paper and played blocks. Now he’s playing brrrrm cars with a pair of bookends.
I’ve been up for two hours and boy am I tired!
I’ve been hosting this website in one form or another for over 13 years and writing the blog for 8 and a half. I can guarantee that if you post what you want when you want instead of doing what’s expected of you, and take a break when you don’t have time then it never gets old 🙂
Now excuse me, I just have to save some small looms from the baby. He’s cleared them off my bookcase so he can drive his car on there. Oh wait, in the time I took to put some links in this post he’s gone back to tearing up paper on the floor. And I need to get his car from the playpen…
And finally we, the imperfect, unstaged photography messy homed crafters of the blogosphere, need a theme song (which I can’t listen to right now because my speakers aren’t working). And who better to sing it than Tim Minchin (that canvas bag is from the one live show that I’ve seen since the baby was born 15 months ago)
Do we all feel better now? 🙂
Actually my birthday was yesterday 🙂
Miss Brittany, Charlie and I went op shopping for the day and had some really amazing finds.
I was making a list of what I was looking for the night before and it only had 2 things on it: 2 soft toys to make into handbags and interesting craft stuff. But then the thought popped into my head that I was going to find a flower loom that I don’t have in my collection. This would be almost impossible for 2 reasons: I have a lot of different looms in my collection already and they were never very popular in Australia (most of my collection came from a convent in the US).
Apparently this was not important because I found this

Not only did I not have this particular anonymous loom in my collection, but it’s also made in Australia. Amazing 🙂
Right next to it in the craft crap bin was this set of multi-looms (also known as magic looms)

Now I don’t have to worry about ruining my good ones if I decide to experiment with wire and video tape and other things that could possibly break a loom.
Earlier in the day I found this cute little pink plastic knitting needle gauge. It’s old but not as old as a lot of them out there because the plastic feels more modern.

and these handles (which the baby is playing with as I type this)

That particular op shop occasionally has really awesome vintage craft stuff but I was really blown away when I found this unworked linen coaster/placemat set (there are 4 of each on the panel).


This find was amazing because we live on the coast, and floral embroideries with ships on are my favourite designs. I have found a few already worked before 🙂
This chicken scratch deer will make a nice cloth for Christmas. I just need to hem the edges. It’s actually a really big piece of cloth, I just folded it under for the photo.

Some awesome fabric. The fur fabric is just right for a stole I want to make my daughter. I couldn’t find it anywhere new, but I found it in a op shop when I wasn’t looking for it for $1

The green 50’s-ish looking fabric is a HUGE piece of knit jersey.
I found my two stuffies to make into handbags and an Ikea rat.

and the interesting crafty bits also from my list: orange cord, 3 packs of bias binding, and 2 balls of yarn. When I was picking out the yarn I met a lovely lady and told her all about ravelry 🙂

Charlie scored some toys for being a good boy. The giraffe was a gift from the op shop volunteers when he blew a gasket and I told him he’d been a good boy all day and it was ok to be tired and grumpy at the end of the day 😀

and finally, in the very last shop, an entire couchfull of t-shirt fabric, ribbing and a little fleecy for sleeves for some jackets I already have in progress

All of the fabric on the couch cost Aud$33, which is the price of three cheap baby t-shirts in Best n Less :-/ There’s enough there to make over a dozen, possibly twice that!
That was my amazing op-shop score but then I got home to find out I’d won a rare flower loom on ebay for 2/5 of my maximum bid, then the unicorn handbag that my daughter missed out on from the Reverse Garbage creative re-use centre came back and was offered to me for $10 (including postage) if I promise to post a tutorial on how to make soft toys into hand bags, which I was going to do anyway.
What a great 40th birthday. I had a feeling it was going to be good when the baby slept in late and I got to have breakfast and a cup of tea before he woke up 🙂
I’m thinking about upgrading the blog to MT 5.0. If everything looks weird please bear with me.
The Muppets sing “Stand By Me”. With bunnies 🙂