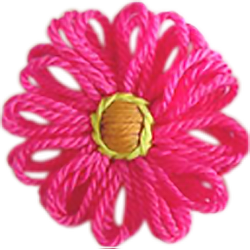
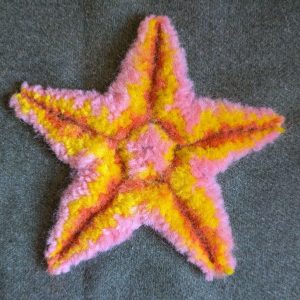
Plush template embroidery has many names. Some of them are from common use that aren’t entirely accurate, some of them named after the tools sold to make it, and a couple that are entirely my fault because I couldn’t find a proper name so I made one up (yes, plushwork and German tufted embroidery were me attempting to name it. Turns out it possibly didn’t originate in Germany. Nobody really knows. Oops).
Whatever you call it, it’s worked over templates, it’s plush, so hopefully “plush template embroidery” is descriptive enough that no matter which country you learnt it in, the name will make enough sense for you to say “Oh, I know that as —”. Fingers crossed.
Whatever you call it, it was a popular technique from the late 1800’s to the first half of the 1900’s. Whilst various plastic tools to make it continued to be available for a few decades after that, it quickly went out of style as an artistic embroidery technique and became more of a novelty craft.
Over the past 12 years I have researched, collected and designed many templates including all of the historical examples I, and my research collaborator (who wishes to remain unnamed), have been able to find. I have tested many different fabrics, threads and techniques and would love for plush template embroidery to become popular again.
What you will learn
● What tools you will need for any plush template embroidery.
● Which yarns and fabrics to use.
● How to make reusable templates.
● Basting your template to the background fabric.
● Embroidering using the knot-free technique.
● Cutting the stitching.
● How to remove your template.
● Brushing and trimming the finished work.
Tools and Materials
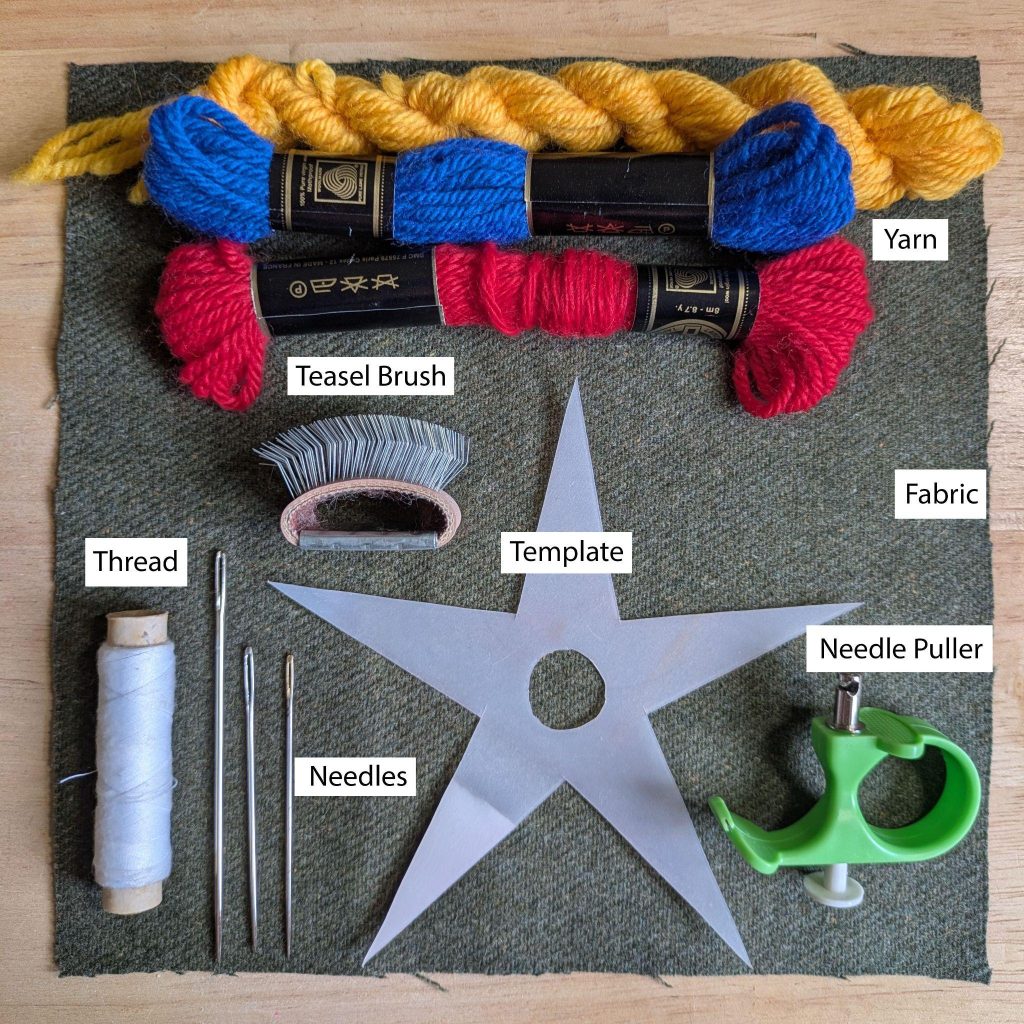
Tools
No matter which design you’re stitching you’ll need the following:
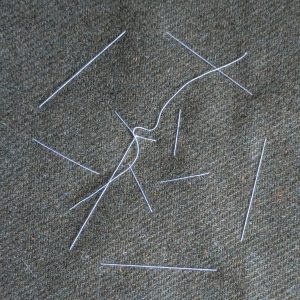
● Sharp, large eyed needles in a size that suits the yarn you’re using. I like chenille needles in a size 18 or 20. A nice sharp darner is also a good choice.
● Thread to baste your template in place. If you use a colour that matches your first layer of stitching, you won’t need to remove it.
● A pair of scissors with sharp points, such as large embroidery scissors.
● A teasel brush, or wire dog brush. (Optional)
● A needle puller or pair of pliers. Again, this is optional, but handy to have in your kit in case you have trouble pulling the needle through on later layers of stitching.
Yarn
In theory, any yarn will work, but if you want to brush out your embroidery for extra plushness, there are a few things to take into consideration. I’ll tell you what I use, and why. Then I’ll give you tips on choosing what you would like to use.
My favourites
My favourite yarns to use are all wool because wool has tiny scales that help lock everything together over time. I most often use needlepoint or tapestry wool. It’s strong, is made from a fairly long stapled wool, comes in a huge range of colours, and brushes out really nicely.
DK or worsted weight knitting wools are also a good choice. Choose one that is made up of two or more plies, and won’t fall apart if you pull on it.
Sock yarns. I stitch with two strands at once. You can make lots of interesting colour effects by combining different colours and self patterning yarns.
This is a great craft for using up scraps of yarns leftover from other projects, and thrifted needlepoint wool from discarded needlepoint and long-stitch kits that were popular in the 1980’s.
Other yarns
In theory you can use any yarn that will hold together while stitching, but they can’t all be brushed after cutting. Cotton, and other yarns made with a very short fibre will disintegrate when brushed. If you’re not sure whether your yarn is suitable, test to see if it’s strong enough, then give the cut end a good brushing to see if it falls apart. If it’s strong enough to stitch with, but falls apart when brushed, you can probably still use it, just don’t brush it after cutting. However, you should always avoid slippery yarns such as polyester, because the threads will pull out too easily.
Fabric
My favourite fabrics to use are all wool because I like to match my yarn to my fabric. Dress weight wools, or old, thin blanketing. However, you can use any medium weight fabric that you can stitch through, but doesn’t have an open weave. Avoid quilting cottons, because the weave can be quite tight and they can be very hard to stitch through.
For this motif you will need:
● Approximately 3/4 of an 8m/9yd skein of dk weight needlepoint point wool (or equivalent) for each layer of stitching. It’s difficult to give exact amounts due to the nature of the technique, but that amount should be plenty.
● A 20cm/8” square of fabric.
Templates
Templates can be made from cardboard or plastic. Cardboard templates can be made from cereal boxes, but will only last for a few motifs. Plastic will last a lot longer.
The template for this tutorial can be downloaded here. When printed, your template should measure 12.5 cm high by 13 cm wide, or 4 ¹⁵/₁₆” by 5 ⅛”. Anything close to that is good enough.
Cardboard
You’ll need:
● Your template printed onto ordinary printer paper
● Cardboard. I use empty cereal boxes
● A glue stick
● A craft knife or scalpel
● A cutting mat or something to protect your table
● Scissors
Stick the template onto your cardboard. Cut any interior shapes out with a craft knife or scalpel first. Then cut around the outside of your template with scissors or a knife.
Plastic
You’ll need:
● Your template printed onto ordinary printer paper
● A permanent marker or pencil
● Quilter’s template plastic
● A craft knife or scalpel
● A cutting mat or something to protect your table
● Scissors
Put the printout underneath your template plastic and trace it onto the rough side. Cut any interior shapes out with a craft knife or scalpel first. Then cut around the outside of your template with scissors or a knife.
Stitching the Classic Star Motif
Basting your Template to the Background Fabric
I’ll be using a template cut from quilter’s template plastic for this tutorial, but the technique is exactly the same if you’re using one cut from cardboard.
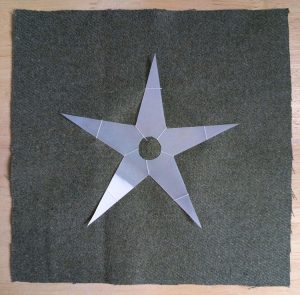
Centre your template on one of your fabric squares and tack it down with thread.
Making big stitches on the back will make it easier to remove later. If you use thread the same colour as your first layer of stitching, you can leave it in.
Embroidering Using the Knot-Free Technique
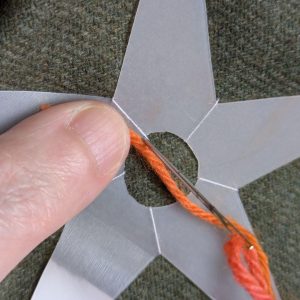
Cut a length of yarn roughly as long as your outstretched arms. Exact measurements aren’t important and it will save you the trouble of measuring every time.
We’ll be starting at the centre of the star. This is the part that creates the pompom in the middle.
Working from the front, hold the end down with your thumb and stitch through to the back. You’ll be stitching right against the edge of the template for this first layer of stitching.
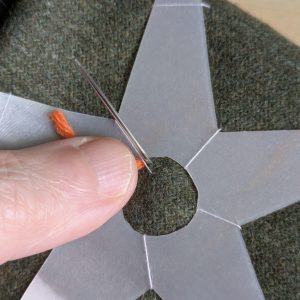
Bring the needle back, right next to the first stitch.
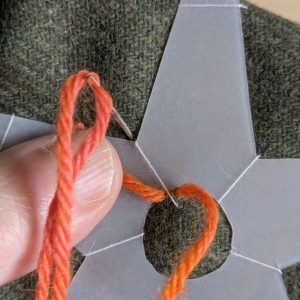
Take the yarn across the template and stitch to the back. It is very important to not pull the stitches tightly. Let them sit gently across the template. If you pull them too tightly, you’ll have trouble getting the tip of your scissors underneath and cutting through them later on. If this happens, you can use a razorblade instead.
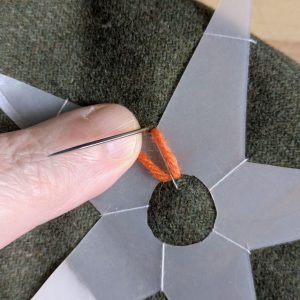
Come back through to the front right next to the last stitch. This stitch is called “surface satin stitch”, and is the stitch used for all plush template embroidery.
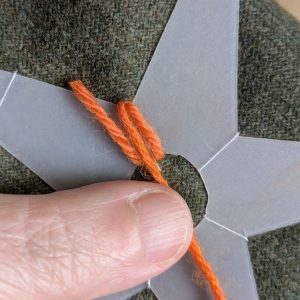
Go back and forth across the template two or three times, making the next stitch directly next to the last one.
After a couple of stitches, you can let go of the end. It won’t come undone.
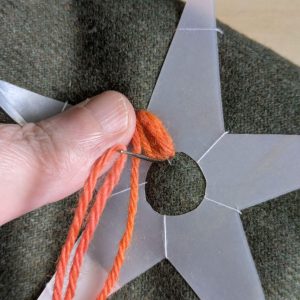
The last stitch should end with the yarn at the back of the fabric. You’ll have about 6 threads going across the template at this stage.
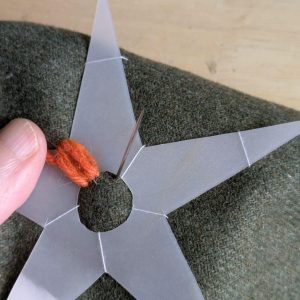
Travel over a little way to the next section and bring the needle to the front again.
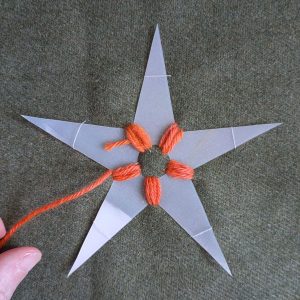
Work all the way around in this way.
When you have worked the last section, finish with the yarn at the base of the “arm” like this.
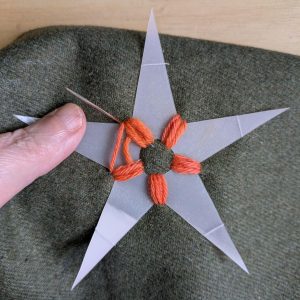
Continue working surface satin across the arm of the star. Always come up through the fabric on the same side as you went down. Work the stitches as close together as you can.
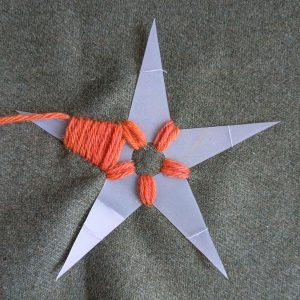
Continue working towards the tip.
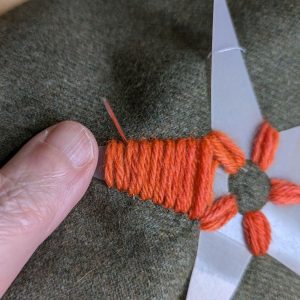
If you see a gap between threads, go back and fill it in as soon as you notice it.
Don’t worry about undoing any stitching unless it’s a long way back. You can just take a stitch backwards and fill in the gap.
I ended up making a little cross stitch by filling in the gaps either side of the slanted stitch. Since the yarn gets cut later, it all works out the same.
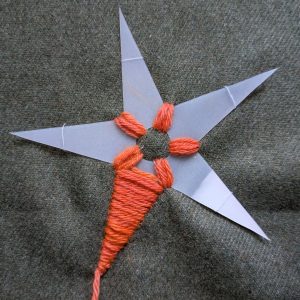
Stitch all the way to the tip, and cut the yarn, leaving a short tail.
Tip: If you’re working all of the layers with the same colour, you can work back and forth without cutting the yarn at the tip.
I recommend working each layer in a different colour for your first try, as it’s easier to see where you’ve stitched.
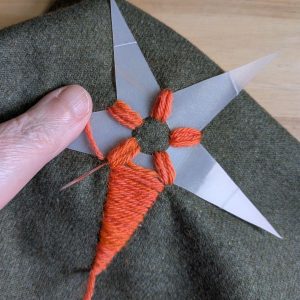
Begin again at the bottom of the next arm, holding the end with your thumb as you did before.
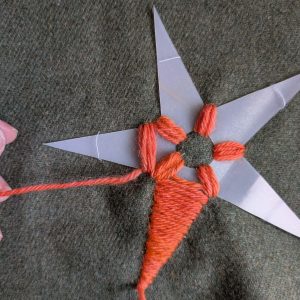
Work your first few stitches over the tail, to hold it in place.
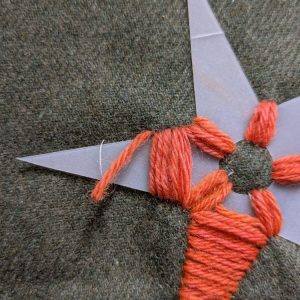
If you run out of thread, cut the tail so it’s long enough to go from one side of the template to the other.
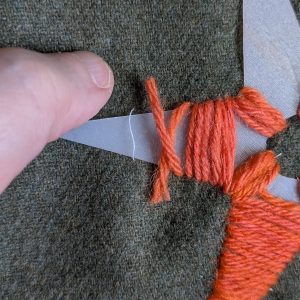
Start again with a fresh length of yarn. Cross the ends as shown in the photo, and hold down both with your thumb.
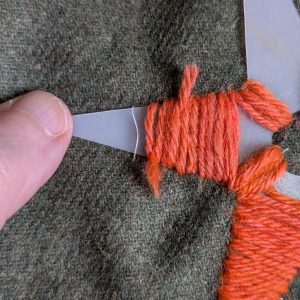
Continue stitching, covering both tails as you go.
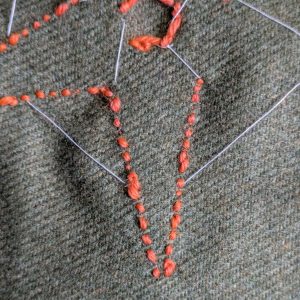
This is how your stitching should look on the back. Small stitches that follow the outline of your template.
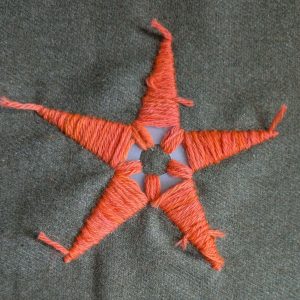
Stitch over the rest of the template in the same way. This is the first layer.
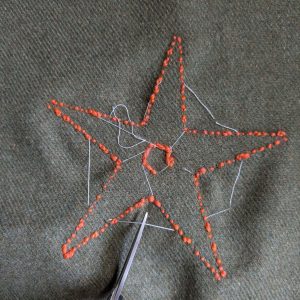
You can now cut the basting threads and remove them if you want to. They probably won’t all come out at this point.
If they’re stuck, trim them close to the fabric and leave them for now.
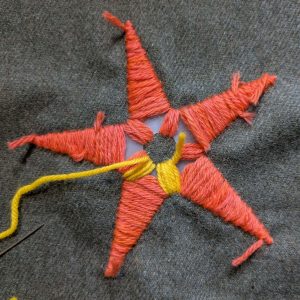
Now work a second layer over the top in the same way. You’ll be able to fit a few more stitches between the arms this time.
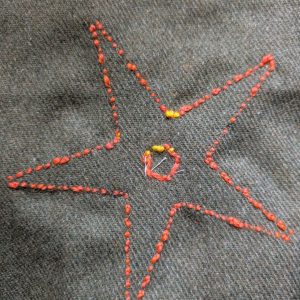
Work this layer as close as possible to the first. This will help lock the stitching in place after you cut it later.
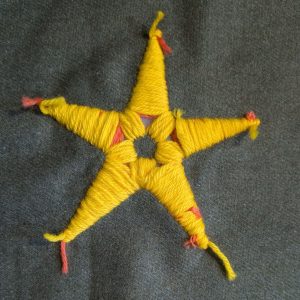
The completed second layer.
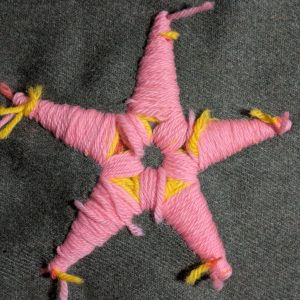
Work a third layer in the same way. If it gets hard to stitch, use the needle puller or a pair of pliers to pull the needle through. It doesn’t happen often, but they’re handy tools to have in your kit in case it does.
I usually like to stop at three layers, but if you like a super puffy star, you can work a fourth layer.
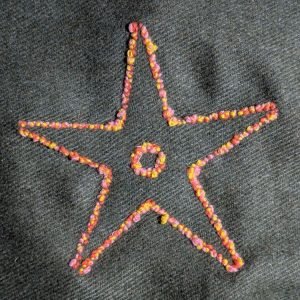
This is how crowded the stitching should look on the back.
Now it’s time to cut everything apart!
Cutting the Stitching
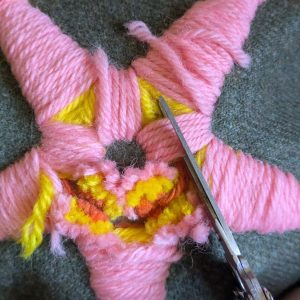
I like to start cutting at the centre.
Using scissors with a nice point at the tip, cut the threads in the middle. Don’t try to cut all of the layers at once, as you’ll hurt your hands.
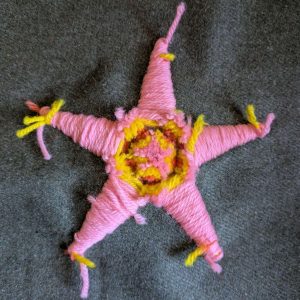
Cut all the way around. This will create the pom-pom in the middle.
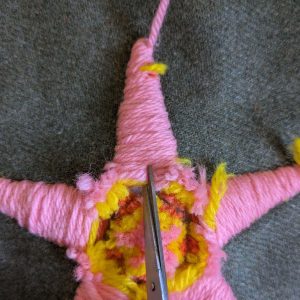
Now cut up the centre of each arm.
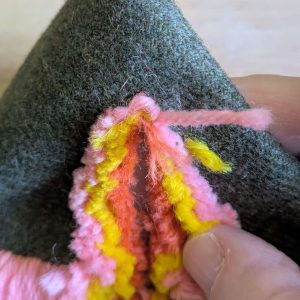
Leave the tiny stitches at the end of any points. It doesn’t matter if you accidentally cut them, but try not to.
Cut up the centre of all of the arms of the star.
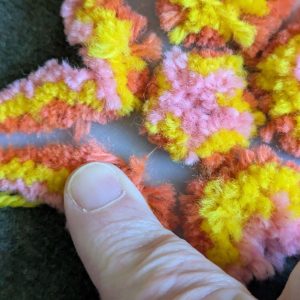
Check to make sure you have cut all the yarn, and any remaining basting threads.
Removing the Template
Now you can remove the template!
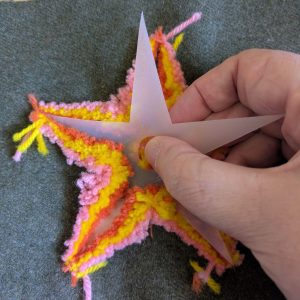
The trick to removing the template without damaging it, is to push the stitching back away from the template. Don’t “pull” on the template.
The pom-pom in the middle will be the most difficult part. Push the pom-pom through the template with your thumb.
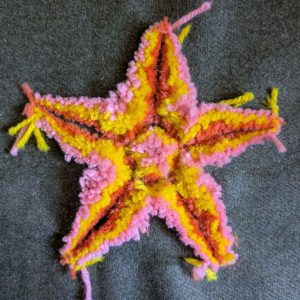
You’ll now have a fluffy star with some loose bits of yarn, and some ends that need trimming.
Hold the end of each of the threads that are sticking out. Most of them will fall off immediately, as they were cut when you removed the template. Trim any they are left, to the same length as the surrounding strands.
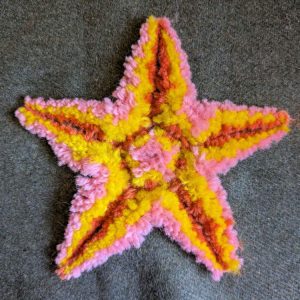
Give the star a bit of a rub with your hand, to make the yarn fill in the gaps and fall into place.
You can leave it like this, or give it a brush to make it really fluffy and lock the stitching into place even more firmly.
Brushing and Trimming
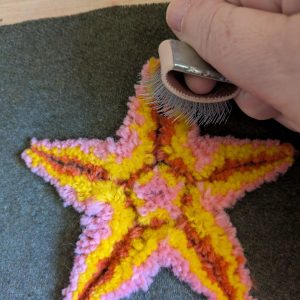
Taking the teasel brush, brush from the left to right on each arm, then from right to left. This will make sure you’ve brushed out all of the threads, on top and underneath. Keep brushing until it’s as fuzzy as you want it to be.
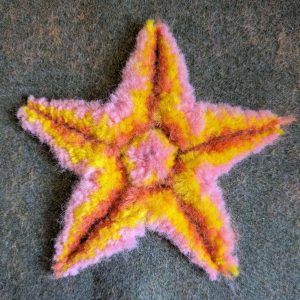
There will be a lot of fluff. You can remove that later.
Trim any threads that are now sticking out, like on the right hand arm of my star.
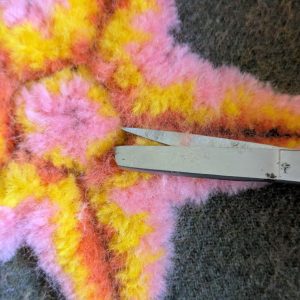
If desired, you can also trim across the top of the fuzzy surface to neaten it up.
Then go across the fabric with a sticky lint roller, or a piece of tape to remove all the loose fuzz.
Your motif is now finished, without a knot in sight!
This tutorial, images, and template are copyright Sarah Bradberry, April 2026