
I’ve started a series of hairpin lace tutorials.
To begin: Casting on and working the basic stitch
I’ve started a series of hairpin lace tutorials.
To begin: Casting on and working the basic stitch
I’m a bit allover the place with my needlework projects at the moment so I thought I’d give a quick pictorial update as to what I’ve been up to. My keyboard is also dying, which is beginning to make typing difficult (half the top row of keys won’t work and the shift and control keys seem to have a life of their own!)
I received this in the mail this week (I love the ring-only edging on the cover):
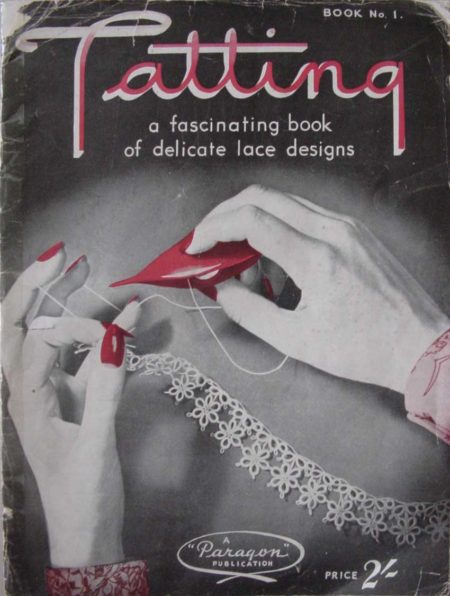
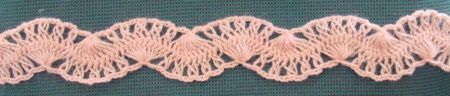
and have decided to use this motif out of it for the doily I wanted to make, instead of the one from Modern Priscilla which I had decided on before. I prefer this one because it’s a bit more complex than the one I was originally going to use, which will make it a bit more challenging.
I’ve been working hairpin lace samples for a couple of articles, plus about half of the first strip for my shawl (the white thing at the top)
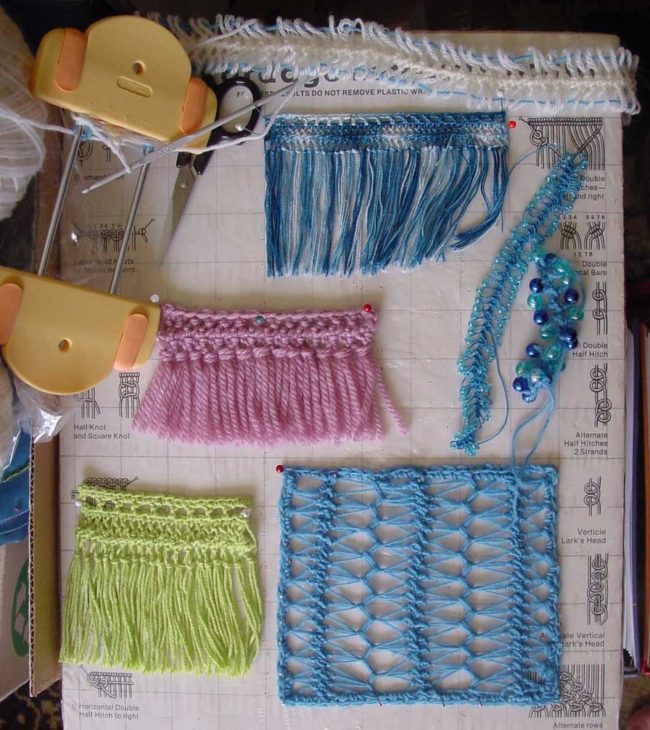
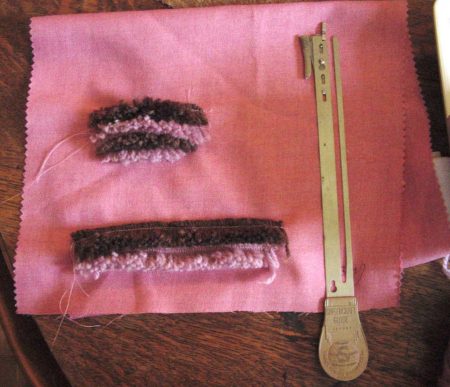
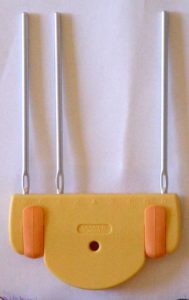
I’ve been learning to use the Singercraft tool to make pile fabrics
and finally, I started a piece of teneriffe lace on my Koppo cushion
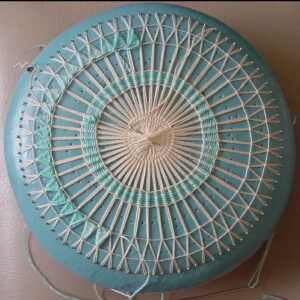
The cream thread is size 40 and the “random kingfisher” is size 20. If anyone knows where I can find more random kingfisher in any size thread please let me know! I bought one ball at an op shop so it’s probably vintage but it’s my favourite colour and I’d like to stock up on some more.
I finally had time to fix the thread crochet butterfly that I stuffed up a couple of weeks ago!
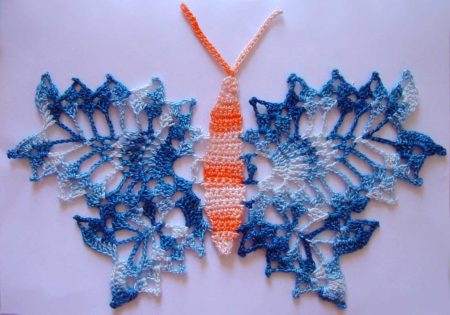
and followed by getting totally carried away making more butterflies 🙂
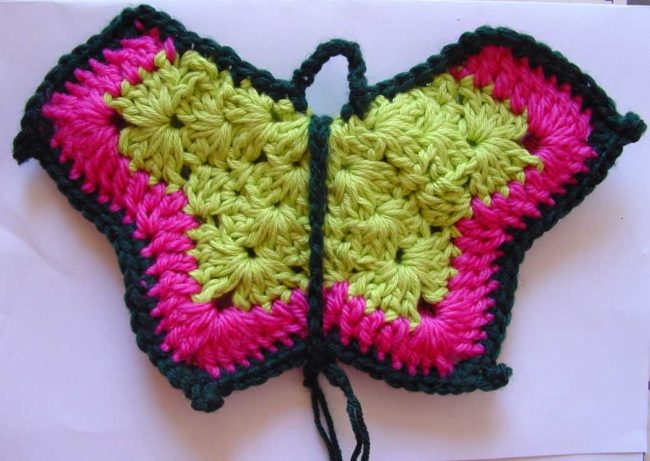
The first one was meant to be a potholder but I wanted to make it as a decoration so I used slightly finer yarn than the pattern called for. Behold the potterfly!
and finally, since you just can’t escape the suffolk puff explosion around here, a suffolk pufferlfy of my own deranged devising.
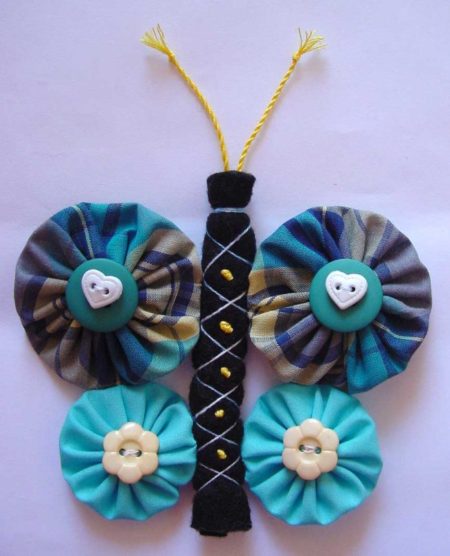
I made the top of the wings with the extra large Clover quick yoyo maker and the bottom with the large yoyo maker. The body is a rolled up strip of felt bound with size 10 cotton and decorated with some french knots.
I’m still playing with hairpin lace techniques. I just found some more patterns in an antique magazine I was looking through last night. Did you know that hairpin lace is also known as hairpin crochet, fork work, krotchee crochet, fourche work, Portuguese lace, Maltese lace and Maltese work? If you’re looking through vintage or antique publications and see references to any of these techniques they may refer to hairpin crochet. Maltese lace and Portuguese lace also refer to bobbin lace and other crochet styles so it depends on the individual pattern. Some patterns just marked as crochet also contain hairpin lacework so it pays to keep your eyes peeled. I had no idea I had so many hairpin lace patterns and techniques in my little collection of antique books and magazines until I read through them all.
Anyway, here’s what I’ve been doing. Since I won’t be adding the hairpin lace section to knitting-and.com until after my brother’s wedding (next Sunday), I’ll put some rudimentary instructions here in the blog for the time being.
First of all, I have come up with a pleasing and extremely simple design for a stole that I want to make for Sunday. (I hope the yarn arrives today!)
Made with fingering weight yarn on a two and a quarter inch staple.
The strips of crochet are made with the double stitch, meaning you work 2 double crochet (US single crochet) into the front of each loop before turning the fork instead of just one. The hairpin braid is then joined together using the cable join as shown here on the Stitch Diva website, but joining two loops through two instead of single loops as shown in the tutorial.
I’m going to make my stole 6ft long (I’m 6ft tall in flat shoes), with white fingering weight yarn, and as wide as I can make it before I run out of time. I want it to be at least 12 inches wide, I hope to make it 24 inches wide though so I’ll need 12 – 25 strips. Wish me luck 🙂
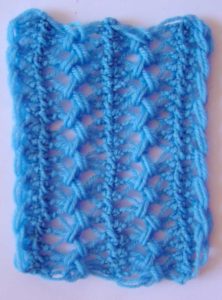
I also had a go at tree stitch, which is great fun to work and makes a really interesting centre to the braid.
To work tree stitch, work a slip stitch into the front of the large loop on the fork, pass the crochet hook under the front thread of the large loop, yarn round hook and draw through (2 loops on hook), *yarn round hook, pass the hook under the front thread of the large loop, yarn round hook, draw loop through** (4 loops on hook), repeat from * to ** once more (6 loops on hook), yarn round hook and draw through all 6 loops on the hook. Turn the fork and repeat for the next stitch. It’s really important not to forget the slip stitch to start with.
One thing I did find with the Clover hairpin lace tool is that it feels incredibly awkward with any yarn finer than Aussie 8 ply (DK weight). I ended up switching to a Pony brand hairpin staple in size 4 to work with the fingering weight yarn in these samples and immediately found it a lot easier. Next time I get to the newsagent I’ll pick up a pack of large paperclips to see what I can do with those.
I suppose I should sew my skirt while I wait for my yarn to arrive, but first a cup of tea…
I’m still sewing the suffolk puff/yoyo coverlet together, enjoying my Farscape marathon and taking breaks with a little hairpin lace experimentation 🙂
After seeing pictures of hairpin lace fringe forks in The Young Ladies Journal (downloadable from Google.com) I thought I’d have a go and see if I could find the best way to make fringe and I think I came up with a nice technique. Here’s what a traditional fringe and fork would have looked like (from the Young Ladies Journal):
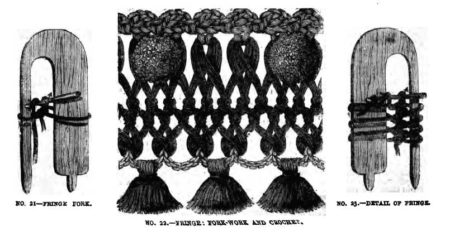
so I set my Clover loom up like this to imitate the traditional fork:
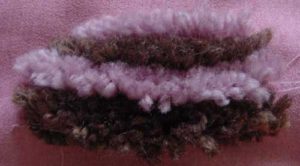
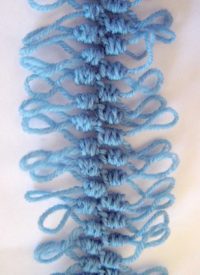
Here are the fringes I came up with.
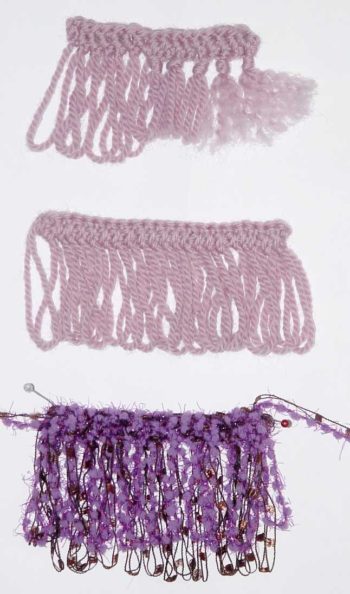
Top: 1 double crochet (US single crochet) worked in the regular way (through the stitch) and then the short loops were chained together as a cable edge. I tied some loops in a knot, then snipped the ends and fluffed out the fringe for another look. I don’t like this fringe as I find the header to be all floppy and unattractive.
Middle: This is the technique I like for a plain fringe. I worked one double crochet per row again, but instead of working through the middle of the loop, I worked under both threads, trapping the whole loop within the stitch. You do have to put a thread through the small loops when you take it off the loom or they will threaten to undo. I threaded the small loops like a cable edge on this sample again. This made a nice tidy and firm header.
Bottom: The same as the middle sample but worked with two novelty yarns held together and a larger crochet hook. The purple yarn shrank when I soaked it overnight. I would have preferred if they had remained the same length. Now I guess I should try some fancier fringes like the ones in the Victorian needlework books! I will be documenting these techniques properly by adding a new section on hairpin lace to the website. Eventually…
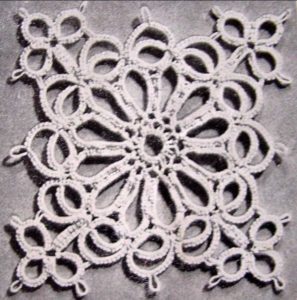
I’ve also decided on a motif for my next tatting project!
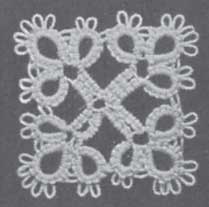
It’s from the Priscilla Tatting Book #1 and I think I’ll make it in size 20, blue thread. I don’t have much blue size 20 thread left so I’m going to see what they have at the needlework store on Thursday. Now, back to sewing all those suffolk puffs together!
I’m getting far too distracted with new toys at the moment, when I should be finishing the suffolk puff/yo-yo coverlet so these will be the last little experiments with new toys until I’ve finished my current projects (or at least most of them!)
I took the test pieces that I made on my new hairpin lace tool last night and played around with them to see what I could come up with.
First of all was a cool ric-rac braid. Made with a small width and a fine thread this would be great as ornamentation on crazy quilting. Made with yarn you could join lots of strips together to make a retro afghan. The waste threads I mentioned in my previous post made this incredibly easy to do because I was never worried about picking up loops from the wrong side of the braid.
I also found reference to hairpin rosettes in one of Interweave’s Weldons reprints (I’ve forgotten which one, I’ll have to go through them again) and had a go making one in yarn.
I just made up the regular crochet part as I went. DK weight yarn on a 4cm pin with a couple of rounds of regular crochet made a 13.5cm rosette. I might use this idea to make a scrap yarn afghan.
Edited to add:
A study of tatting combined with hairpin crochet lace. With lots of interesting links if you just want to do the crochet.
Stitch Diva Studios Tutorials
I have to go out now but I’ll see what other links I can come up with for tomorrow!