Menu Close

Mostly Knitting Blog

Want to find the new stuff on Knitting-and.com, or read about my latest projects and discoveries? This is the place.

TAST Catch Up 3 out of 5

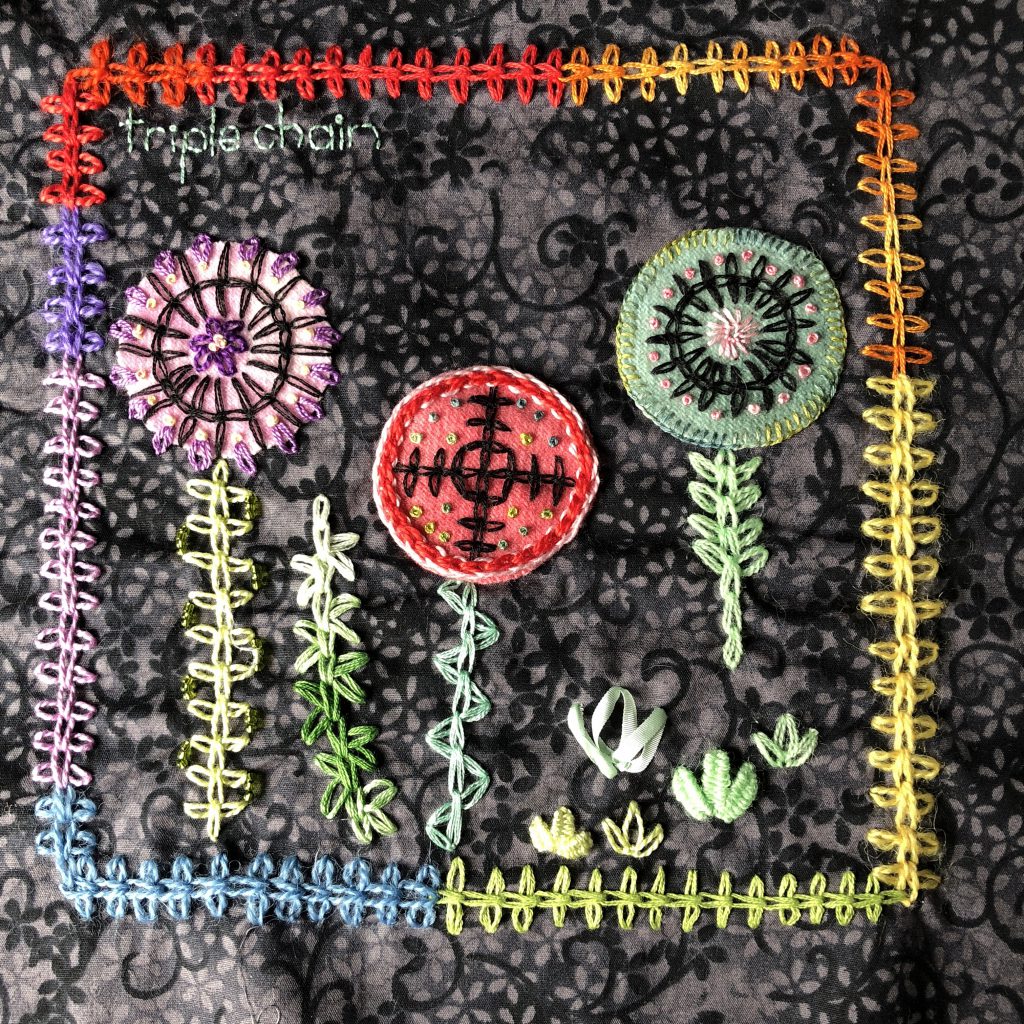
Welcome to part three of my “I can’t believe I finished the TAST 100 stitch embroidery challenge” catch up series. I accidentally published two posts yesterday (oops), but never mind, I have a feeling there will be a lot more embroidery going on around here to tell you about!

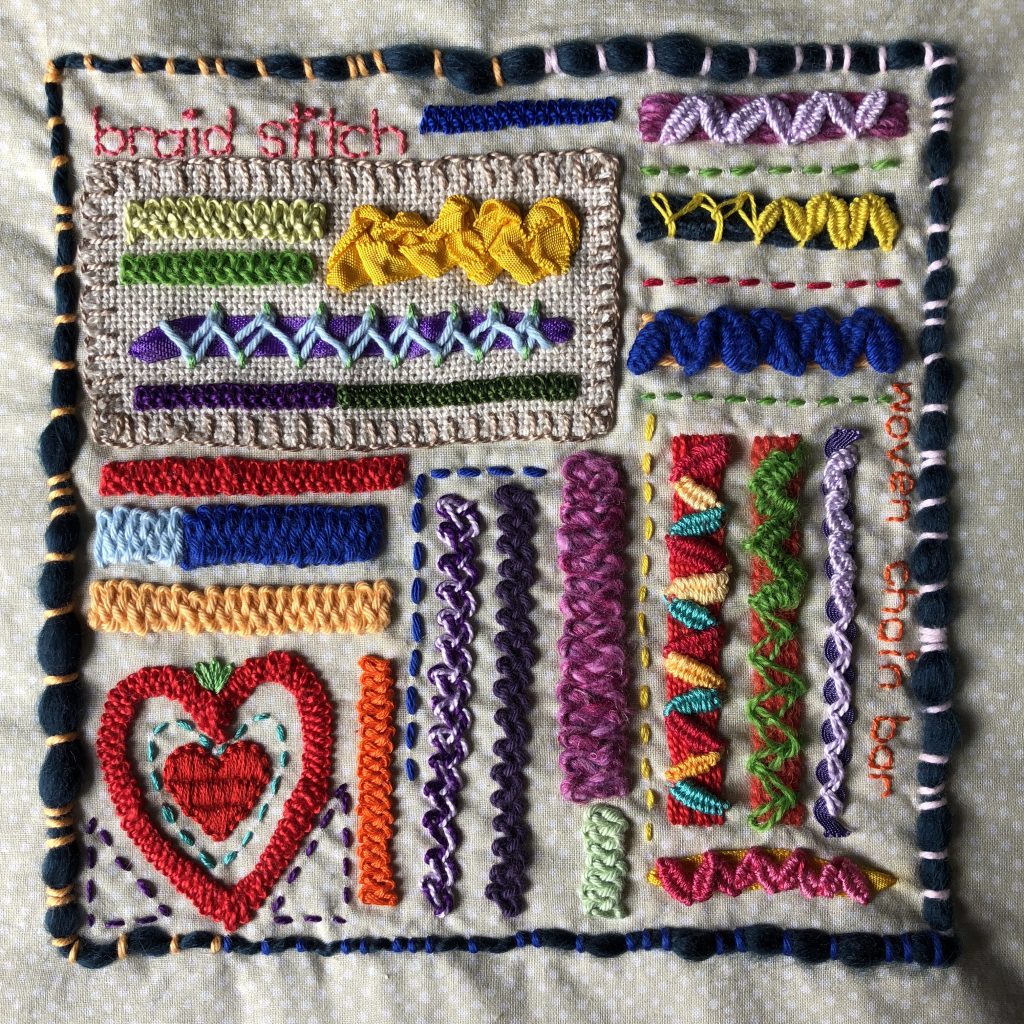
Braid stitch wasn’t a TAST stitch as far as I can remember. I tried it with a few different threads and I’m really not a fan. I just couldn’t get it to look nice, no matter what I did.

Stitch 99: Woven chain bar

Once again, I tried this stitch in an assortment of threads. It didn’t work well in wool because of the crimp or bounciness of the thread. Cotton lays nice and flat, however and looks pretty good. I’d reserve this for graphic elements worked in straight lines. Ever shortening rows stacked on top of each other for a roof, for example, or perhaps a single row for a window box.

Woven chain bar and braid stitch worked in a variety of threads on quilting cotton.

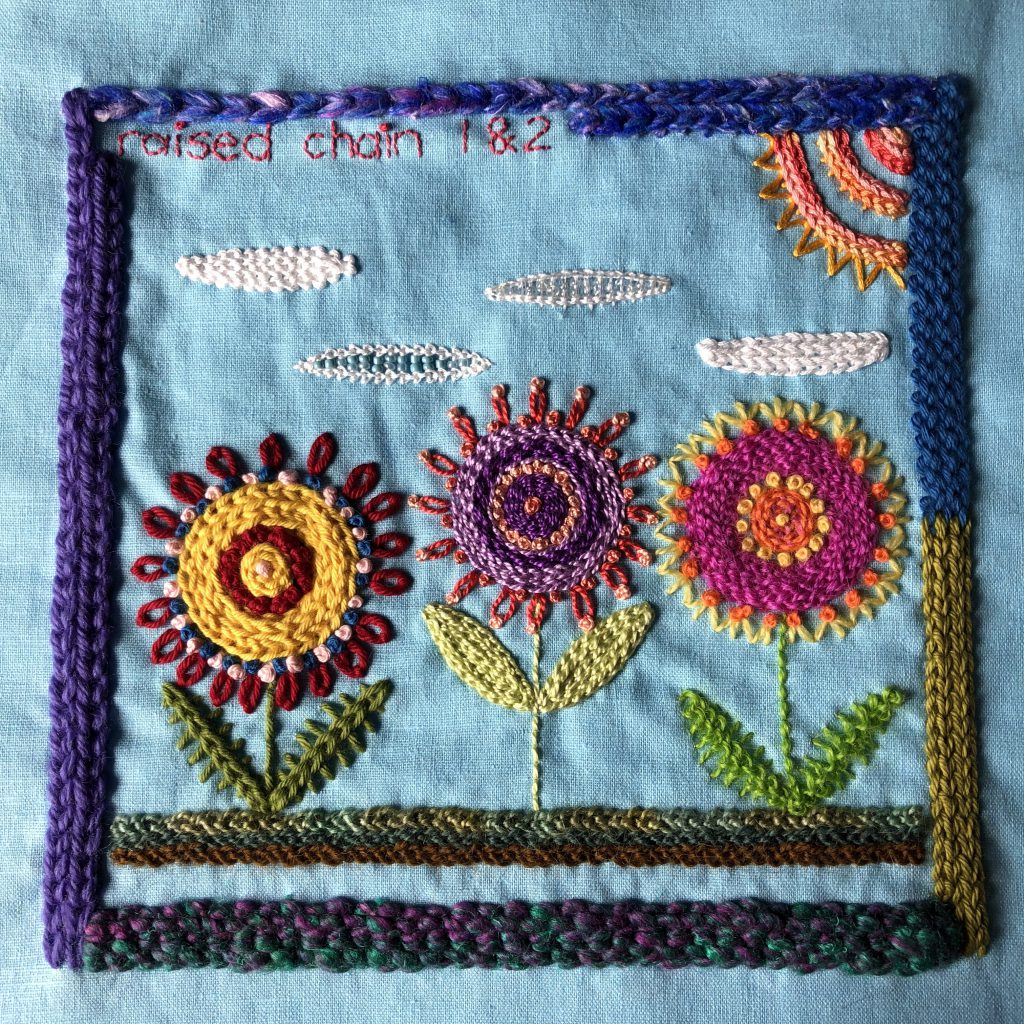
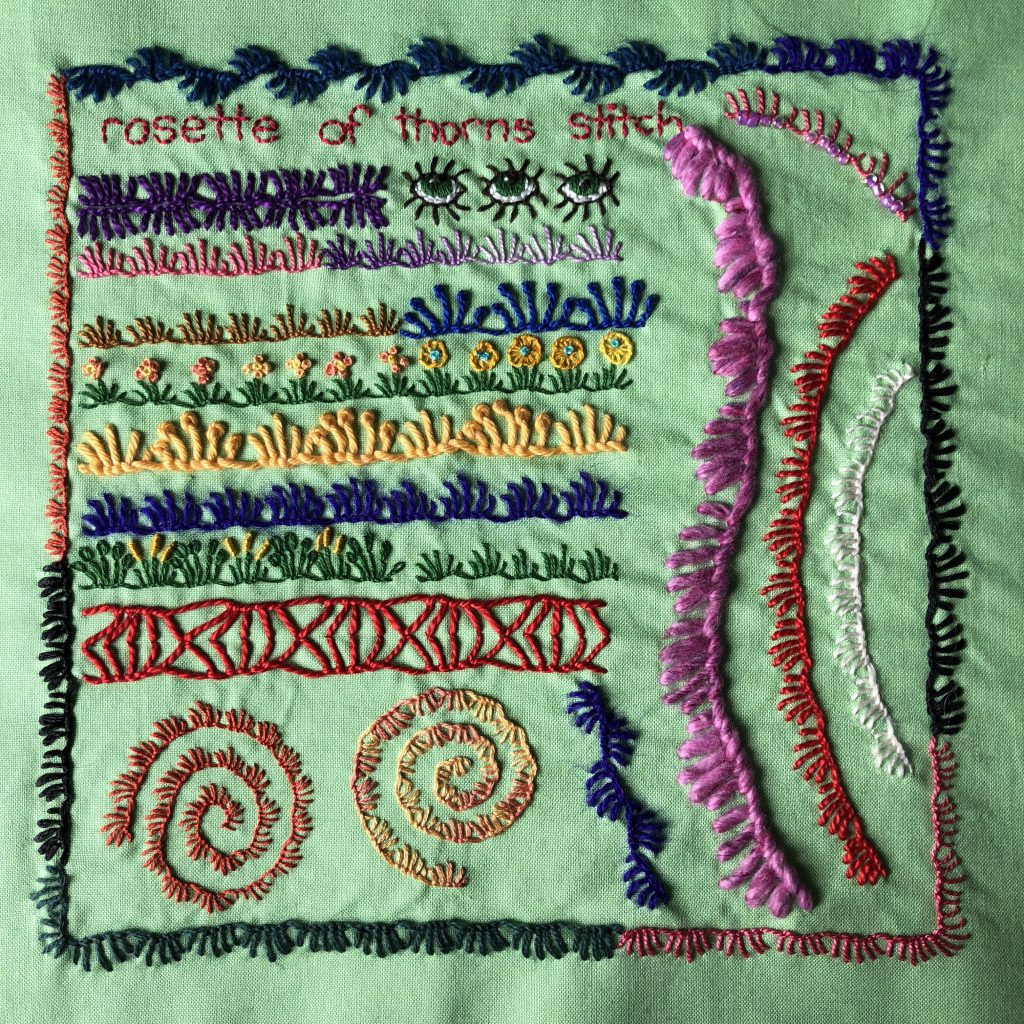
Rosette of thorns is another non-TAST stitch. I had to try it because I love pretty much all variations of blanket stitch. I tried lots of different threads, from my finest perle cotton to thick knitting wool/silk mix. I love how useful this stitch is. It makes great grass and flower stems, eyelashes and geometric borders. It also works well in straight lines, spirals and curves. I think my favourite, however, is the top of the border where I alternated which side of the line the stitches were formed. Worked vertically in green it would make an amazing fern-like plant.

Embroidered motifs and border treatments worked in rosette of thorns stitch.

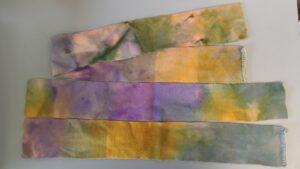
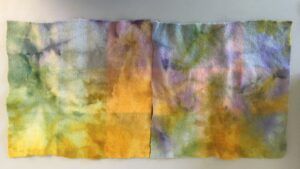
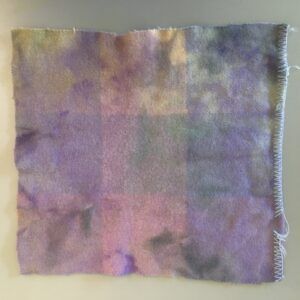
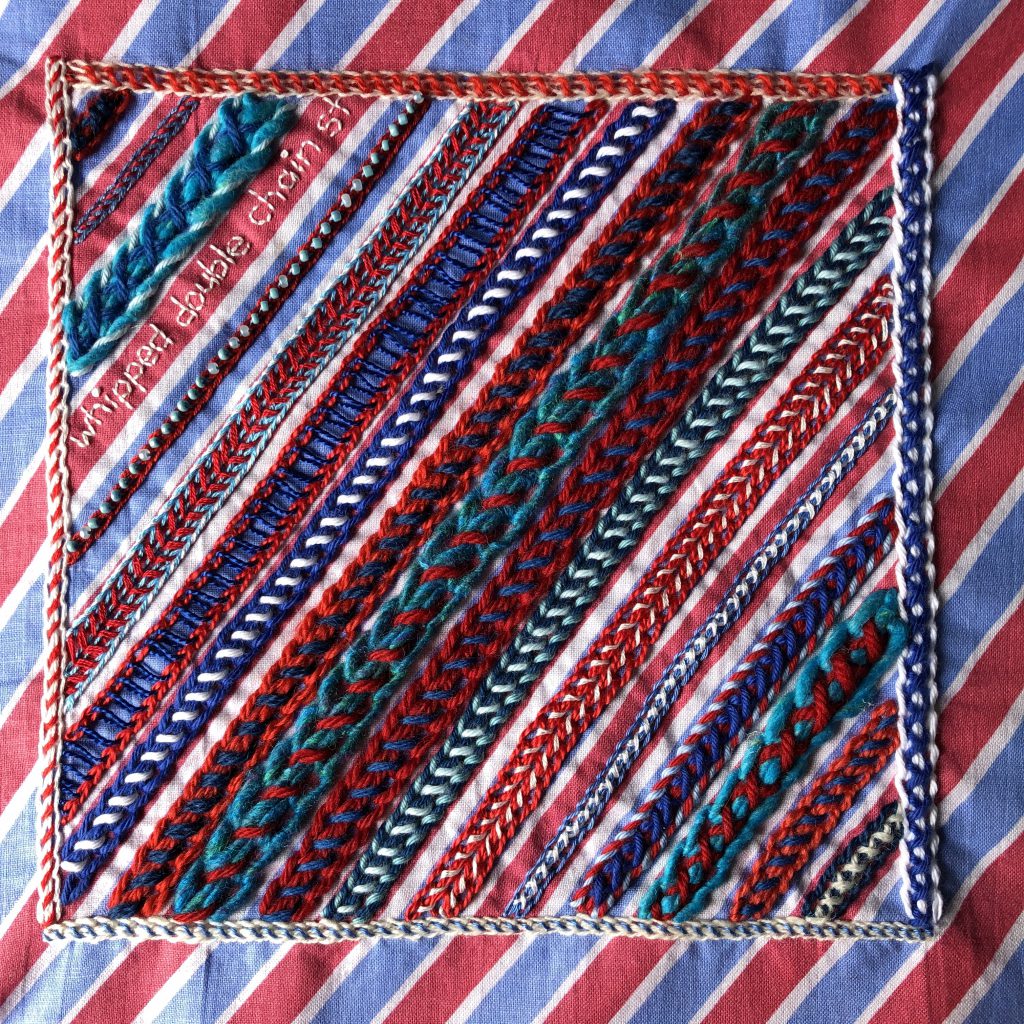
Stitch 80 revisited: Double whipped chain stitch.

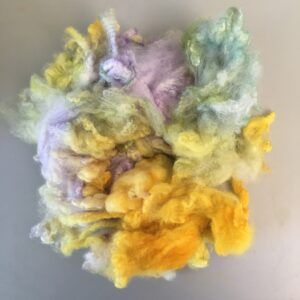
I worked a few different lines of whipped double (or double whipped) chain stitch back when it was first announced, but I had a lot more variations and threads to try out. When I came across this great fabric in my stash, I knew they’d go perfectly together. I tried just about every thread I have in both wools and cotton, whipped triple rows, spaced rows apart, whipped the centres and the edges and whipped in both directions to make cross stitches up the centre. This would be a tricky stitch to work in circles, but it’s a great one for border treatments and seams.

Whipped double chain stitch worked in a variety of threads.

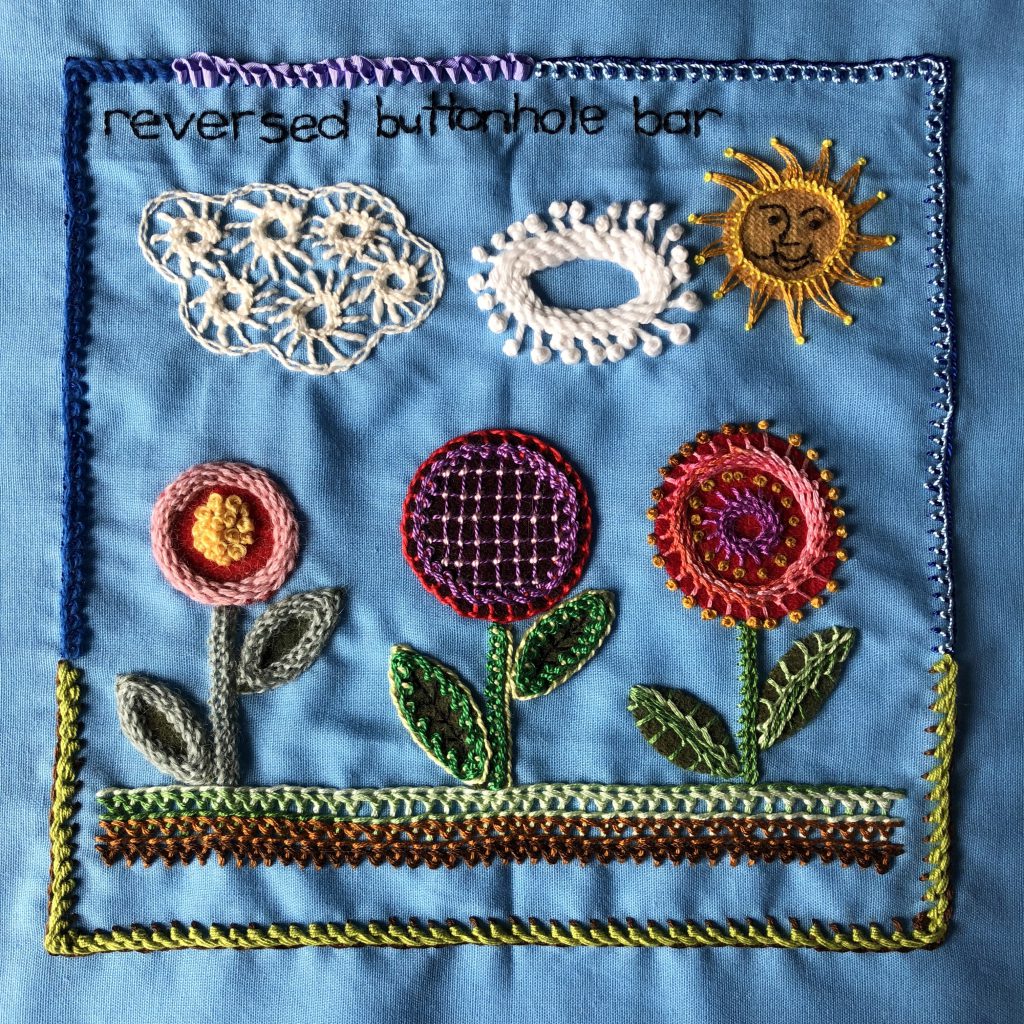
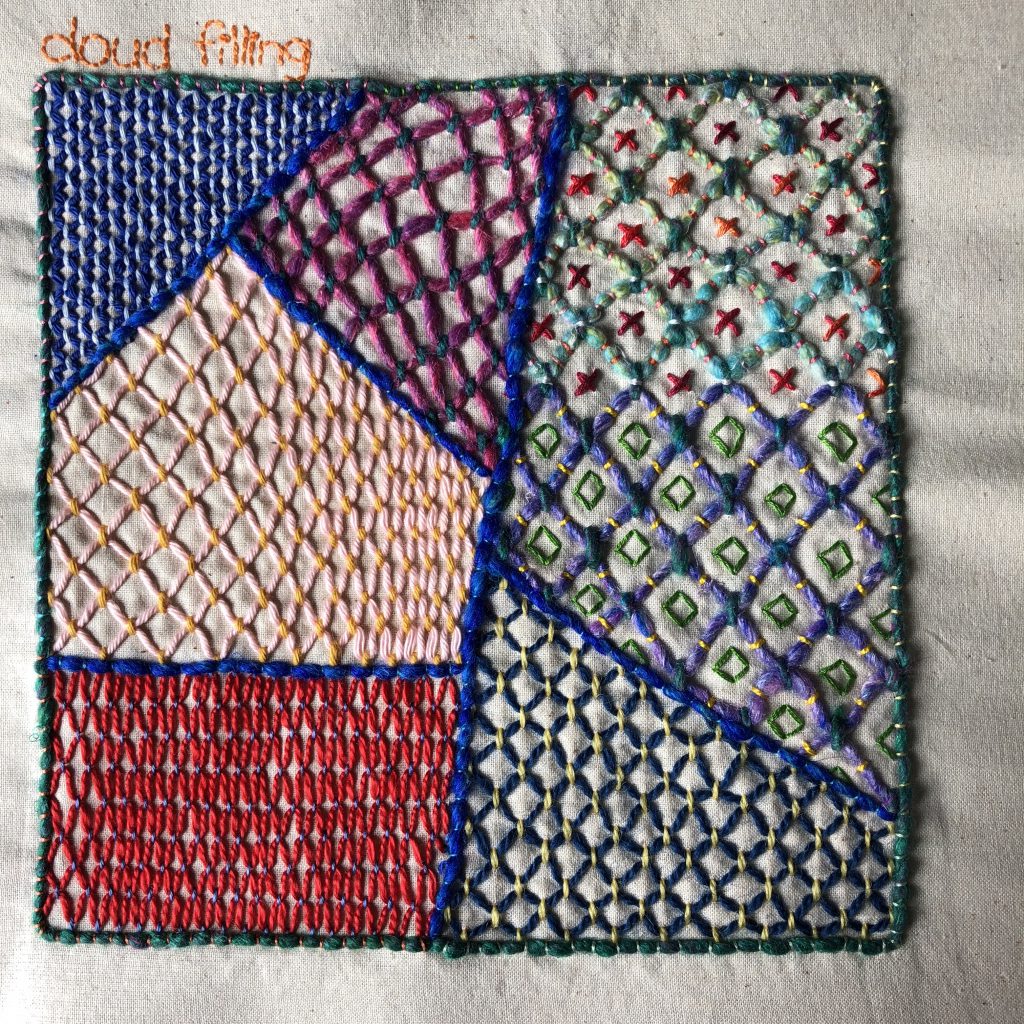
Stitch 38: Revisiting cloud filling stitch.

I recorded cloud filling back in August 2016 but didn’t experiment with it at all. In this sampler, I tried lots of different ways of spacing the ground stitches the yarn is woven through, as well as lots of different yarns. In the pale pink area I started more spread out on the left and gradually made the vertical rows of stitches closer together, which gives a lovely sense of movement and perspective.

Cloud filling embroidered in a variety of threads.

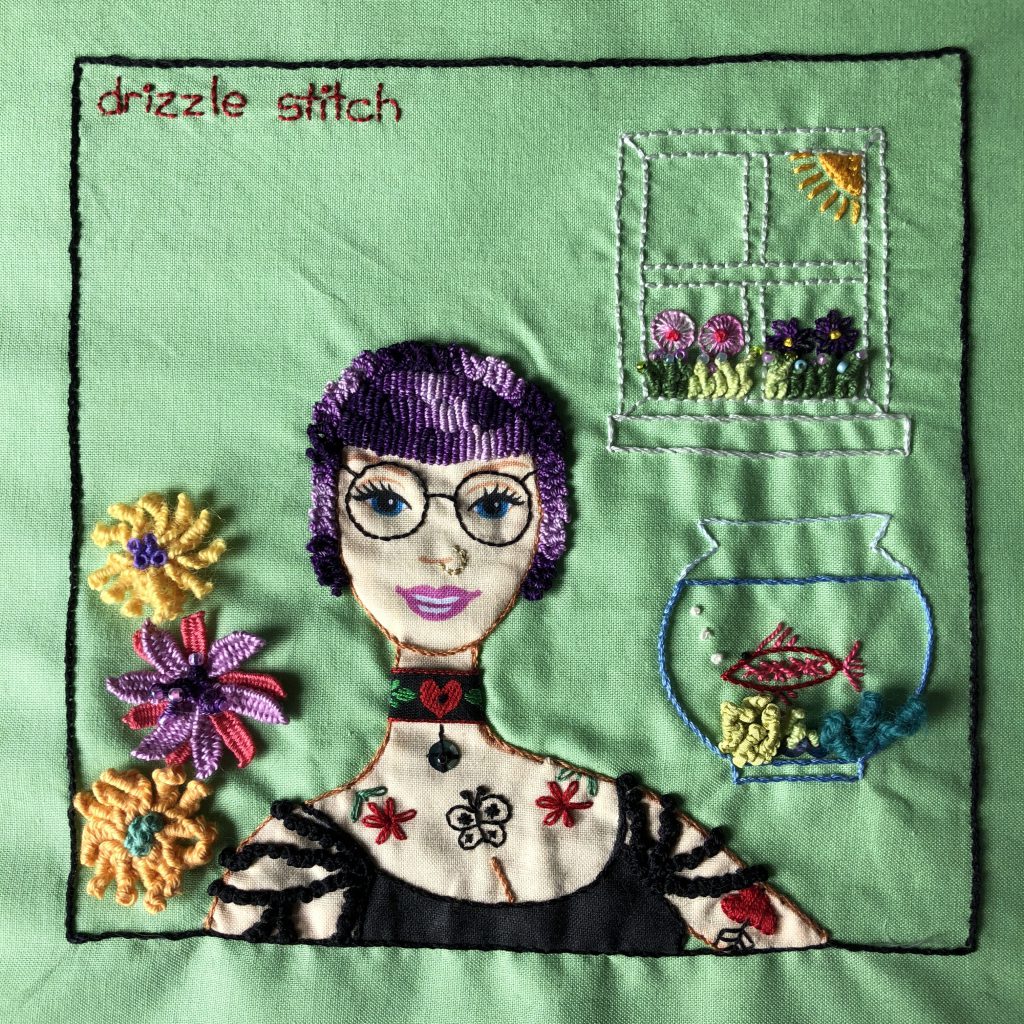
I then used cloud stitch to embroider most of this little picture.

Sunny day tree scene worked in cloud stitch.

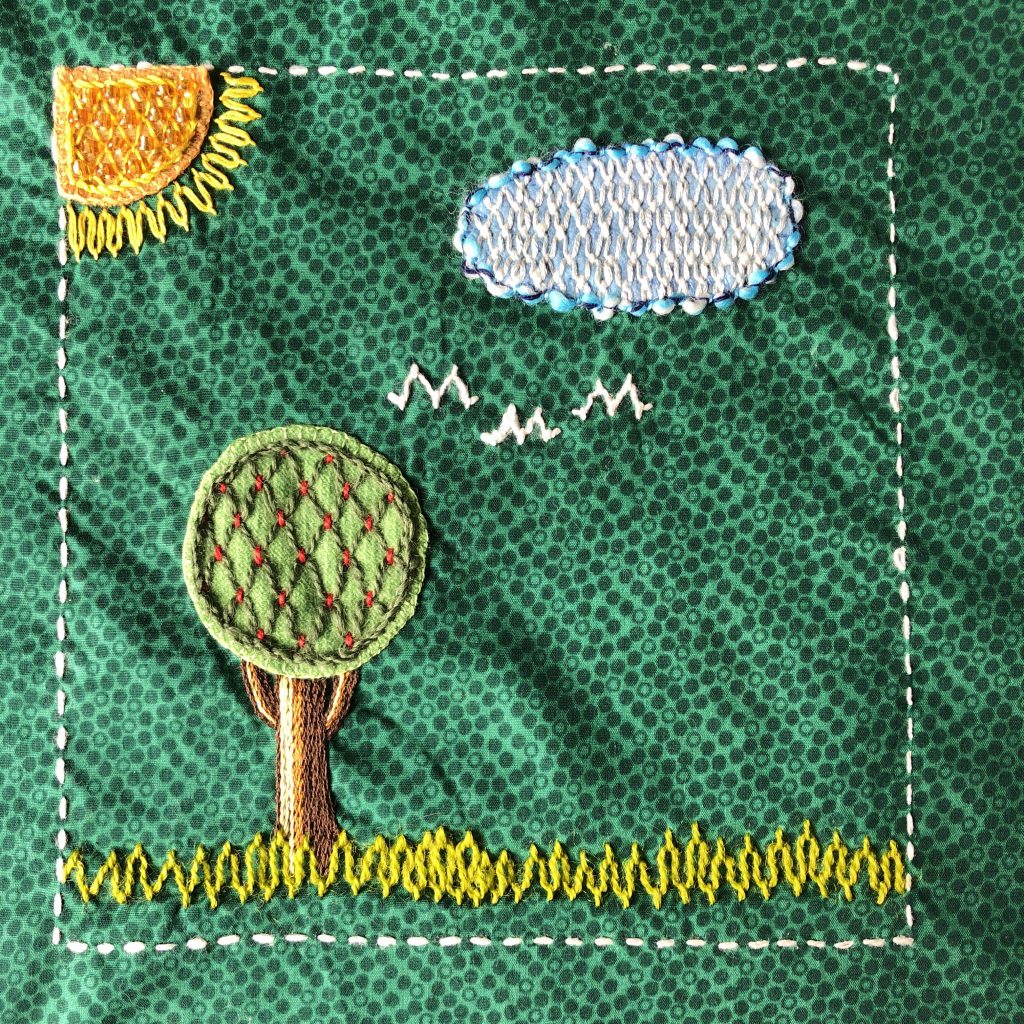
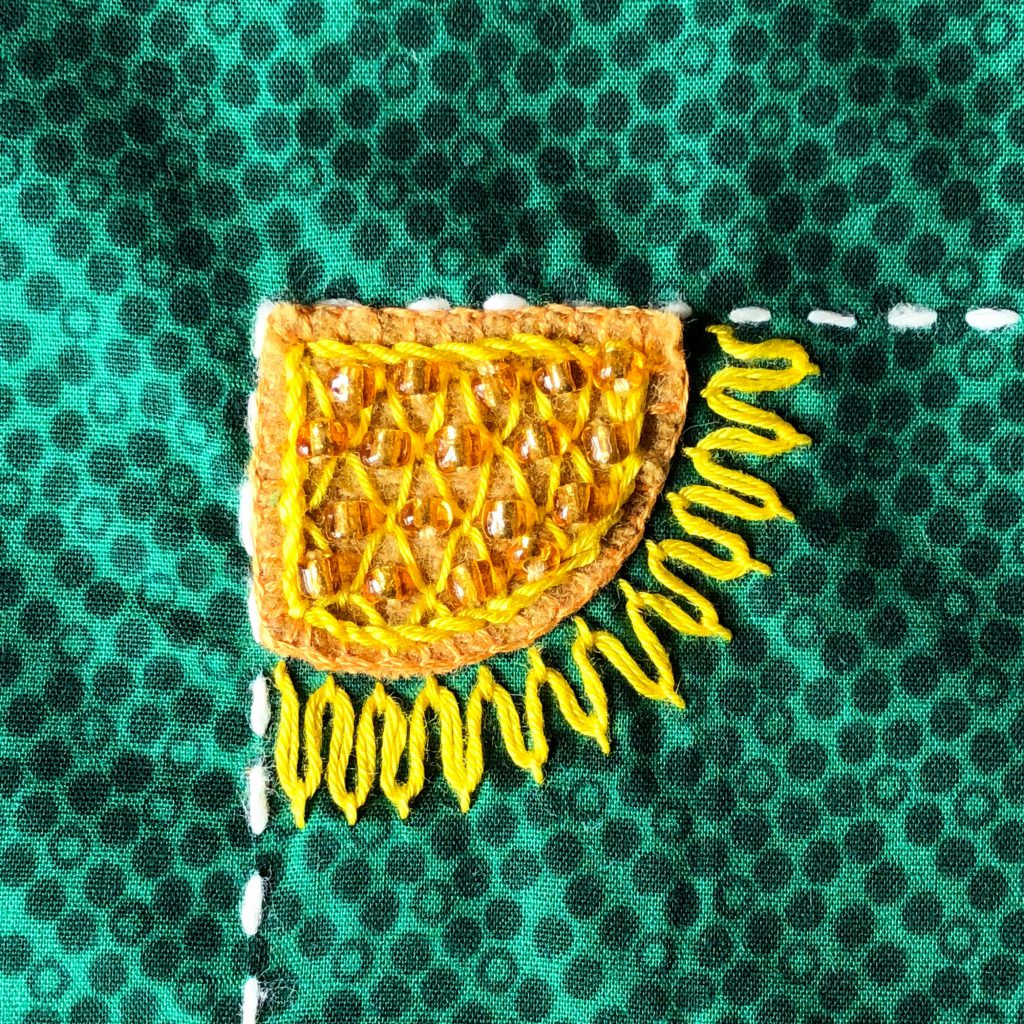
I’m particularly fond of the beaded section in the sun. After working the cloud stitch, I stitched a gold bead into each diamond shape.

Beaded quarter sun worked in cloud stitch

Well that’s it for part three of my five part TAST catch up. See you tomorrow for more!

signature

TAST Catch Up 2 out of 5

Welcome to part 2 of my TAST catch up series, where I’m showing off the last of my samplers for TAST 2015-2017

Stitch 98: Triple Chain

For my triple chain stitch sampler I used a range of cottons and wools on quilting cotton. Triple chain is a very graphic stitch so I used it to embroider some 1960’s mod style flowers on appliquéd wool felt. Changing the angle of the stitches that stick out either side can change the look quite dramatically. My favourite is the green “bamboo” worked in variegated green floss. I also wove some little grass bits with just one repeat of triple chain.

My final assessment of triple chain stitch is that it’s great for dramatic looking borders, graphic flowers and stalks of bamboo.

Three flowers worked in triple chain stitch on quilting cotton using a variety of different threads.

Stitch 63 revisited: Triangular feather stitch

I didn’t do much with it, the first time I worked triangular feather stitch, so I decided to try it again. I chose to experiment with border treatments, layering and working circles.

For the border treatments I worked the stitch on alternating sides and tried different ways of combining two rows while also changing the lengths of the feathered part of the stitch. I quickly realised that this is one of those “chameleon” stitches that looks great no matter what you do with it.

Triangular feather stitch embroidery sampler showing borders and layering.

Stitch 97: Feather and chain stitch

At first I thought feather and chain stitch was a bit boring, just feather stitch with a loop. But I wanted to see what I could do with it that might push it a bit beyond that. I decided to work just on border treatments combining feather and chain and other basic stitches to create something that might look good on a crazy quilt (even though I don’t sew crazy quilts). My favourite ended up being the pink flower bud border on the right. I worked two rows of feather and chain facing outwards, butted up against each other. Then added pink french knots to the feathers “stalks”, and a darker pink detached chain in the diamonds formed by the zig-zag part of the feather and chain stitch. (You can click the photo for a closer look). I’m still undecided about the red row with woven chain. It’s tick season here at the moment and they look a little buggy to me…

Feather and chain stitch borders embroidered on bright blue even-weave fabric.

Stitch 37 revisited: Triangular buttonhole stitch

Triangular buttonhole is another stitch I didn’t explore much the first time I worked it, only having added beads. This time I sketched out some motifs to try, and different ways to combine rows to make border treatments. I also worked a row with the triangles on alternate sides. I really like all of these experiments but I think the row with triangles alternating on the top and bottom  is my favourite.

Motifs and border treatments worked in triangular buttonhole stitch.

Stitch 100: Drizzle stitch

Drizzle stitch is one of those “helper” stitches that really don’t work well on their own. I struggled a bit with deciding what to do with it, but then I found a scrap of Barbie doll fabric in my stash and this idea was born. Barbie just isn’t my thing, plus the top of her head was missing so I gave her a makeover.

In this sampler the drizzle stitch is worked as the foliage for the flowers in the window box, the outer layer of Barbie’s hair (her fringe is bullion stitch), the seaweed in the fish bowl, the petals of the top and bottom flowers and the centre of the middle flower. I added a bead to some of the drizzle stitches. I think it worked great for all these purposes and might use it in the future if I work something really textural.

Embroidered sampler with drizzle stitch details

Well that’s it for part two of my five part TAST catch up! Check back tomorrow for part three.

signature

TAST Catch Up 1 out of 5

Whilst rummaging through my boxes full of TAST (Take a Stitch Tuesday) embroidery samplers, I realised I had over 20 that I hadn’t shown you yet. So this is the first in a series of five posts showing everything you haven’t seen. (BTW, TAST has started afresh for 2018 so if you’d like to join in, visit the TAST FaceBook group for details).

These are in the order I embroidered them (sort of). Or at least the order I grabbed them out of the box when I ironed them. Click the photos to make them larger if you’d like to view details up close. Here goes!

I didn’t really give raised chain v1 & raised chain v2 much of a chance when I first embroidered them so I went back and had another go. This time I tried threads from the thinnest (a fine cotton) to the thickest (worsted weight knitting wool). I stitched rings (the flower centres are filled with other stitches), leaves and clouds and even added beads to the ladder stitches with raised chain either side.

Embroidery sampler with two versions of raised chain stitch.

My conclusions after working raised chain 1 & 2  is that they make great ring shapes, look fabulous in just about any thread and are wonderful stitches for borders and “grounds” in garden scenes.

Next up was Italian border stitch, which I don’t think was an official TAST stitch for the 2015-2017 TAST challenge. Again, I tried lots of different threads. I even used it to stitch down a giant leaf sequin.

I think my favourite uses for this stitch weren’t the borders at all. I really love it for making circles and leaves.

Embroidered sampler featuring Italian border stitch on beige quilting cotton

Next are a bunch of stitches that definitely weren’t TAST stitches but after completing all 100, these were stitches I wanted to record for  future use. Frilled buttonhole stitch (from Let’s Learn Embroidery), Kiko’s flower stitch and cast on stitch.

As usual, I tried lots of different threads. I found Kiko’s flower a bit tricky when it came to getting the bullion stitch to sit nicely. It’s a very pretty stitch but one I’d use sparingly. I like the purple blue-bell looking flowers the most. Frilled buttonhole is a definite favourite though, as is cast on stitch.

Embroidery sampler featuring lots of different flowers

Next up are more “not TAST’ stitches. Shisha stitch and Gujrati stitch on a medium weight wool.

I used a few different methods for working shisha stitch. A google search will reveal many different tutorials but if you like working from books, I highly recommend “Shisha Mirror Embroidery, a Contemporary Approach” by Jean Simpson. It contains no less than 10 different ways to work shisha embroidery and has an amazing collection of motifs that include mirror work.

I used a couple of mirrors, but mostly experimental things. From left to right –
top row: sequins trapped behind a square of plastic, laminated playing card, laminated book page
middle row: a button, flattened bottle cap, mirror
bottom row: laminated playing card, mirror, old sequin.

Shisha and gujrati stitch embroidery sampler on wool.

I worked the Gujrati stitch in cotton on the left half and wool on the right. These are two of my favourite stitches that I’m definitely going to use a lot more in the future.

Next up, TAST 2015-2017 stitch number 96 was reversed buttonhole bar.

I worked single rows on on the buttonhole (or blanket stitch) foundation, all the way up to filling it completely. This is another stitch that makes really great rings, borders and grounds. I’m especially fond of my little sun and the left hand cloud, which is worked in some of my very first handspun cotton.

Garden scene embroidery sampler worked in reversed buttonhole bar stitch.

Well that’s it for the first TAST catch up post! I’ll be posting one a day for the next 4 days, then showing off a recently finished project and the first month of embroidery for “Beyond TAST” 2018 so look out for a whole week of stitchy goodness.

signature

How to Line a Box with Fabric, Braid and Buttons

Today I have a brand new photo tutorial for you! Would you like to know how to line any wooden or sturdy cardboard box with a professional finish like this?

Needlework box lined with fabric

Then check out my new tutorial, “How to line a box with fabric”.

You can use these three techniques to transform anything from shoe boxes to hand made wooden boxes like mine.

I hope you enjoy learning this new skill, and making upcycled heirloom pieces from ordinary boxes.

signature

Upcycling Materials with a New Dye Job

My regular readers have probably figured out by now that I mostly use other people’s discarded materials from the op shop (that’s Australian for charity shop/thrift store). Sometimes that means the materials might need a bit of tweaking before they get used.

A week or so ago I was going through my needlepoint wool stash for a project and found I was missing a few colours that I needed, but I also had a few that I was never going to use. Out came the dye pots!

While I was at it, I thought I’d dye a few other things from the stash too.

These are the needlepoint wools I started with.

I dyed them, along with other things using the immersion technique. You can find a tutorial on immersion dyeing here. I didn’t stir my dyepots because I wanted variegated effects on my threads and fabrics.

This is my first red dye pot ready to go onto the stove. I dyed needlepoint wools, blanket pieces and silk threads all in one pot.

Red dyepot

Here are the results of the yarns that I dyed. I did 20 different dye pots in all. Firstly, the needlepoint yarns in some of the colours I needed. The indigo blue was supposed to be purple but the silk threads in the dye pot sucked up all the pink before the wool had a chance.

Hand dyed needlepoint wools

On the left: knitting yarns (machine washable wool), right: crewel wool.
I rummaged through my stash for some knitting yarn to dye purple since the needlepoint wool turned out blue.

Hand dyed knitting yarns and crewel wools

Skeins of rug wool

Hand dyed rug wool

Crepe spun silk thread. The dark pink skeins at the bottom (the top 2 pink) were first dyed red but turned out to have large white patches because I hadn’t untwisted the skeins properly. I over dyed them pink.

Hand dyed silk crepe thread

Silk twist. This thread has one thicker unspun ply twisted with a thread. It’s super shiny in person.

Hand dyed silk twist

Woven silk tape.

Hand dyed silk tape

Along with the threads, I also dyed pieces of a vintage wool blanket that I bought from an op shop for a couple of dollars. Here you can see the original colour when I presoaked it before dyeing.

Vintage blanket soaking before dyeing

Those of you who have seen my TAST embroidery samplers will know I like to use a similar type of felted wool in my embroidery. It’s super expensive to buy if you want to use large amounts, so I’ve been collecting vintage wool blankets in colours I can dye.

Technically it’s not felt, it’s fulled or boiled wool blanketing but it’s often called hand dyed felt when you buy it.

Hand dyed vintage wool blanket

Hand dyed vintage wool blanket

Hand dyed vintage wool blanket

I was lucky enough to also find a large piece of velour style wool blanketing in a discarded embroidery kit, plus another piece, for a few dollars. I dyed that too.

Hand dyed "velour" wool blanketing

After all of that dyeing I had a jar of green dye left over after deciding I’d put too much green in one of the dye pots and I took half out. I grabbed a small bag of smushed up locks, gave them a presoak for half an hour and rainbow dyed them along with the left over vintage blanket.

Here’s a tutorial I wrote many years ago on rainbow dyeing.

Rainbow dyed wool locks

I can’t wait to use these pieces in something. I don’t know what yet but it will be embroidered and colourful!

Rainbow dyed vintage wool blanket

Rainbow dyed vintage wool blanket

Rainbow dyed vintage wool blanket

Which of course meant that I was now left with three half jars of dye! So I pulled pieces off a wool quilt batt, stuffed them in the jars for an hour to soak up as much as possible and steamed them for half an hour.

To steam yarns in jars like this you need a few things:

  1. Make sure you’re using proper canning jars. I used Fowler’s canning jars that I bought at the op shop. If you’re in the US you might know them as Mason jars.
  2.  A cake rack or other rack to put in the bottom of your saucepan.
  3.  A saucepan with a lid that is deep enough to take the jars and still seal properly when the lid is on.

Place your cake rack in the bottom of the saucepan. Place the jars on top. Add 3 or 4 inches of water to the saucepan. Add lid and simmer for 30 – 40 minutes. Check the water level every 10 – 15 minutes to make sure it isn’t boiling dry.

Hand dyed wool

I plan on spinning these wools into embroidery threads. Speaking of which, I still have 22 embroidery samplers I’ve finished to tell you about! Maybe I should get ironing…

signature