
Water lilies are incredibly difficult to photograph but they have a lovely depth that makes them one of the prettiest ribbon straw flowers.
Try making at least one and you’ll see how lovely they really are.
 |
To make a water lily you will need a flower loom with three rounds and some ribbon straw
Begin by winding around your loom in figure eights on the largest round as shown on the left. |
 |
Continue winding in figure eights |
 |
moving over one peg each time |
 |
until you have gone all the way around. |
 |
Work all the way around the loom three times. |
 |
Next wind another shade of the same colour around the middle sized round in smaller figure eights, following the diagrams below |
    |
|
 |
Work three layers for this round also.
Stitch the centre using back stitch, then stitch over the top with stem stitch. Trim the ends and hide them in the back. |
 |
Shaping your finished flower is simple.
Make a circle with the fingers and thumb of one hand and push the flower down into it. |
 |
Then pinch all the way around the base with your other hand to help it keep the new shape. |
|
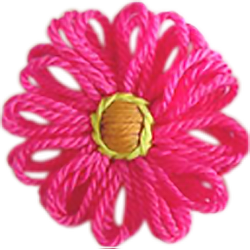
My finished flower.
|
This tutorial is based upon directions from “Magic with Ribbon Straw” by Craft Course Publishers, 1970. Updated text and images are copyright Sarah Bradberry, April 24th 2011. All rights reserved.